
Automate AXS Payments with Python Selenium for random rewards with GXS Debit Card

I love automation, especially with Python Selenium where I wrote an article previously. I also love cashback and miles. Then I thought why not mix it up?
In this article, we will explore automating making tax payments on AXS with Python Selenium using GXS Debit Card.
This article is to demonstrate what Python Selenium can do. It's meant for people that are familiar with the basics of Python or intend to learn Python.
Examining the AXS Page and get the necessary elements
We first navigate to the homepage https://e-station.axs.com.sg, right click and inspect to check the DOM. If you are unsure, please check out the previous article on how to examine the DOM.
bills_icon_xpath = '/html/body/div[3]/table[1]/tbody/tr[2]/td[1]/a/div/img'
Here I grab the xpath for the bills icon.
general_xpath = '/html/body/div[3]/table/tbody/tr[2]/td[1]/a/div/img'
On the next page, I grab the xpath for the general icon.
iras_xpath = '/html/body/div[2]/div[2]/a[6]/div/img'
Next, I grab the xpath for IRAS.
individual_income_tax_xpath = '/html/body/div[2]/div[2]/div[2]/div[1]/div[1]/a'
Next, I grab the xpath for individual income tax.
tax_reference_no_radio_btn_xpath = '//*[@id="inputTypeReferenceNo"]'
tax_reference_no_input_xpath = '//*[@id="referenceNo"]'
amount_xpath = '//*[@id="amountPaidReferenceNo"]'
add_to_payment_summary_xpath = '//*[@id="btnAddToPaymentSummaryTablet"]/a'
Next, I grab a few elements. The radio button, the tax reference number input, amount, and add to payment summary button. Make sure you clicked on the tax reference no radio button first, cause the input field is dynamic and the xpath is different from the payment slip.
enter_your_email_xpath = '/html/body/div[3]/div[2]/table/tbody/tr[4]/td[2]/a/span'
Next, we grab the enter your email xpath.
email_address_input_xpath = '//*[@id="eReceiptEmailAddress"]'
update_btn_xpath = '//*[@id="btnUpdateEReceiptEmailAddressMobile"]/a'
Next, we grab the email address input xpath along with the update button xpath at the bottom.
proceed_to_pay_btn_xpath = '//*[@id="btnPayNow"]'
Next, we grab the proceed to pay xpath.
debit_card_xpath = '//*[@id="debit_card"]/div[2]'
Once you clicked on proceed to pay, a pop up showing different payment mode will appear. Here, I grab debit cards xpath.
other_banks_xpath = '//*[@id="dc_other"]/img[1]'
Once you clicked on the debit cards xpath, another pop up will show respective banks and other banks. Here, I grab the other banks xpath.
card_num_xpath = '//*[@id="cardNo"]'
expiry_date_xpath = '//*[@id="cardExpiry"]'
cvc_xpath = '//*[@id="cvv"]'
submit_btn_xpath = '//*[@id="btnSubmit"]'
Now we are at the page where we have to input our card details. We grab all the elements such as card number, expiry date, cvc and the submit button.
For this, I created the following function and accept 1 argument, instead of 3.
def enter_card_details_page(card_details):
    card_num, expiry_date, cvc = card_details
    card_num_xpath = '//*[@id="cardNo"]'
    expiry_date_xpath = '//*[@id="cardExpiry"]'
    cvc_xpath = '//*[@id="cvv"]'
    submit_btn_xpath = '//*[@id="btnSubmit"]'
    WebDriverWait(driver, 20).until(EC.element_to_be_clickable((By.XPATH, card_num_xpath)))
    driver.find_element(By.XPATH, card_num_xpath).send_keys(card_num)
    driver.find_element(By.XPATH, expiry_date_xpath).send_keys(expiry_date)
    driver.find_element(By.XPATH, cvc_xpath).send_keys(cvc)
    driver.find_element(By.XPATH, submit_btn_xpath).click()
    print('card details entered')
    time.sleep(0.5)
When I call the function, I passed in a tuple and use tuple unpacking to unpack into 3 variables.
card_num, expiry_date, cvc = card_details
I find it's more readable this way. I store the card details in a dictionary.
PAY_FROM_CARD_DETAILS = {'eric_gxs_debit_card': ('1234567890123456', '0000', '111')}
When I call the function, I will pass the key into the argument.
enter_card_details_page(PAY_FROM_CARD_DETAILS['eric_gxs_debit_card'])
I find this easier to read. Although you can also pass in 3 arguments as well. That's totally fine.
Getting OTP
The next page requires us to enter the OTP into the OTP input field, and click the ok button.
otp_input_xpath = '//*[@id="otpForm"]/table/tbody/tr[9]/td[3]/input'
ok_btn_xpath = '//*[@id="submitOTP"]'
Fortunately, for Mac computers, you can access the OTP via the iMessage database on your Mac directly. Phew!! Imagine just sitting there and standby to key in OTP for x number of times.
Credit to Yorgos who wrote this article.
import sqlite3
import pandas as pd

# substitute username with your username
conn = sqlite3.connect('/Users/username/Library/Messages/chat.db')
# get the names of the tables in the database
pd.read_sql_query(f"SELECT * FROM sqlite_master WHERE type = 'table'", conn)
Here we connect to the chat.db using sqlite3. I used pandas read_sql_query method and extract all the names of the tables in the database.
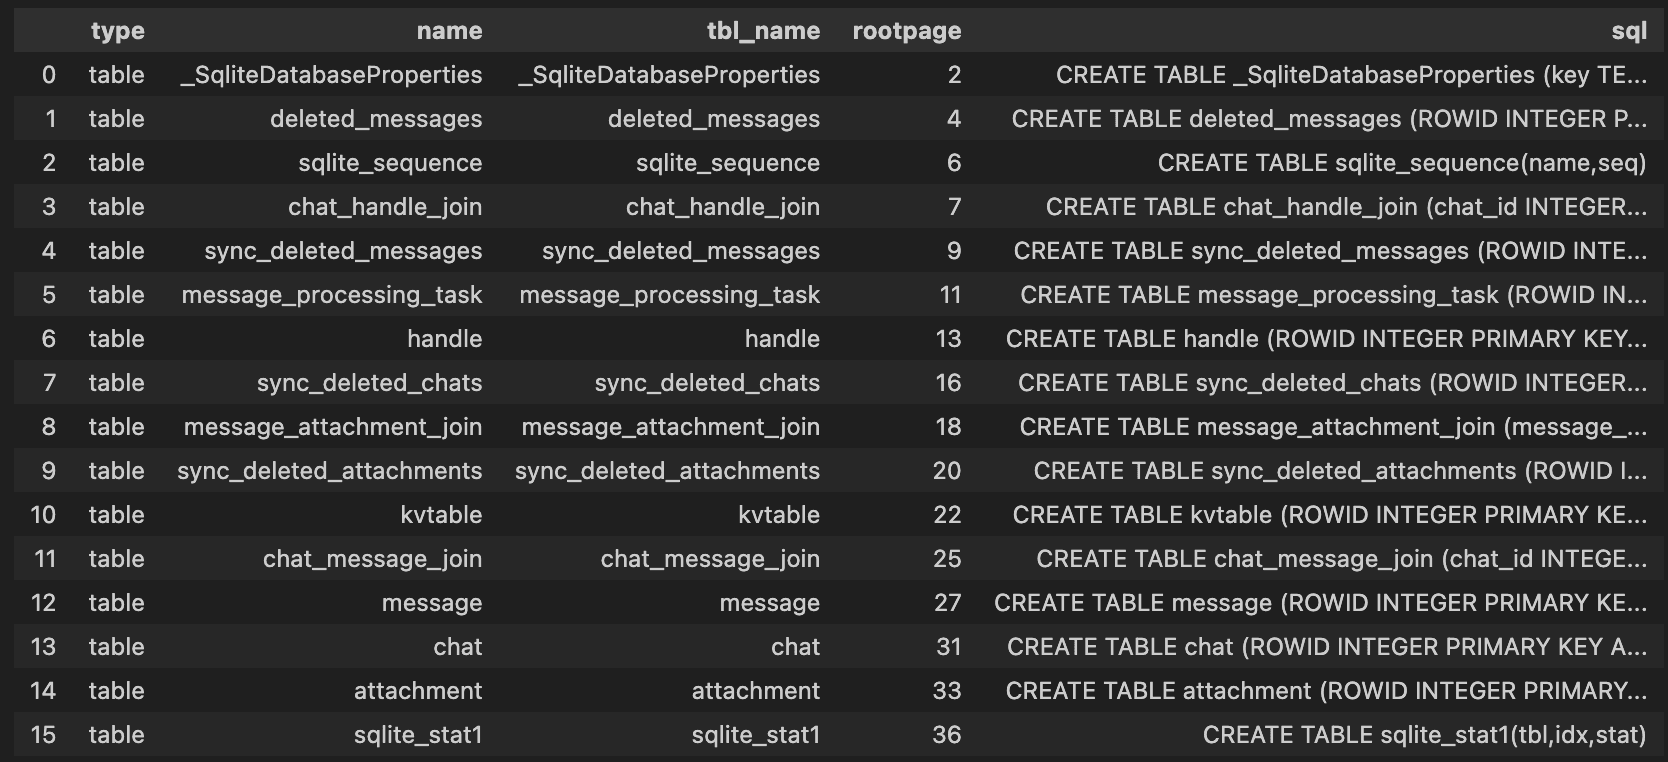
You can see there's a few tables but the one we are interested in is the message table
We need to do some exploratory work to find out how to get the messages from GXS.
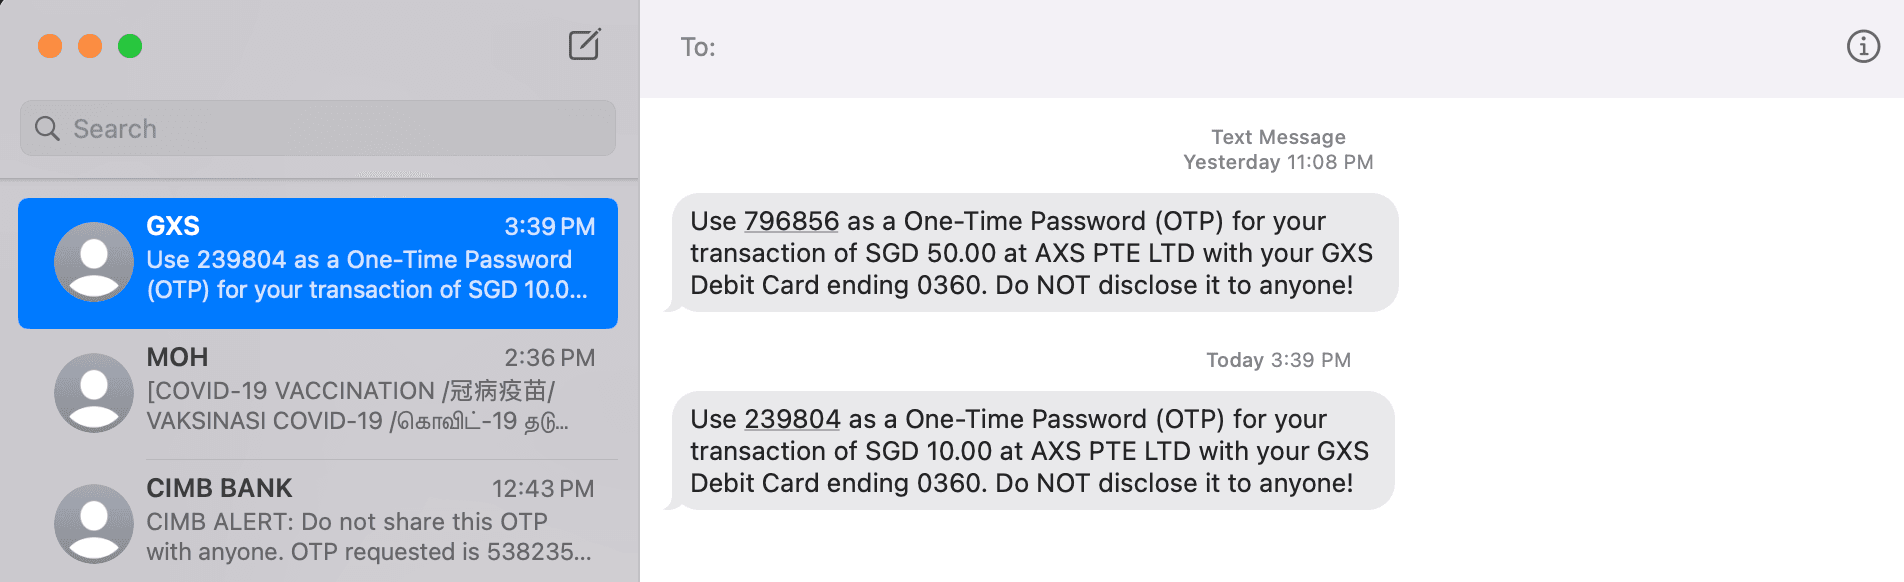
I checked the SMS I received from GXS to determine the text they sent to use it in my SQL query to search.
df = pd.read_sql_query("SELECT * FROM message WHERE text LIKE '%GXS Debit Card%'", conn)
df.head(10)
I ran the above SQL query to extract text that matches GXS Debit Card.
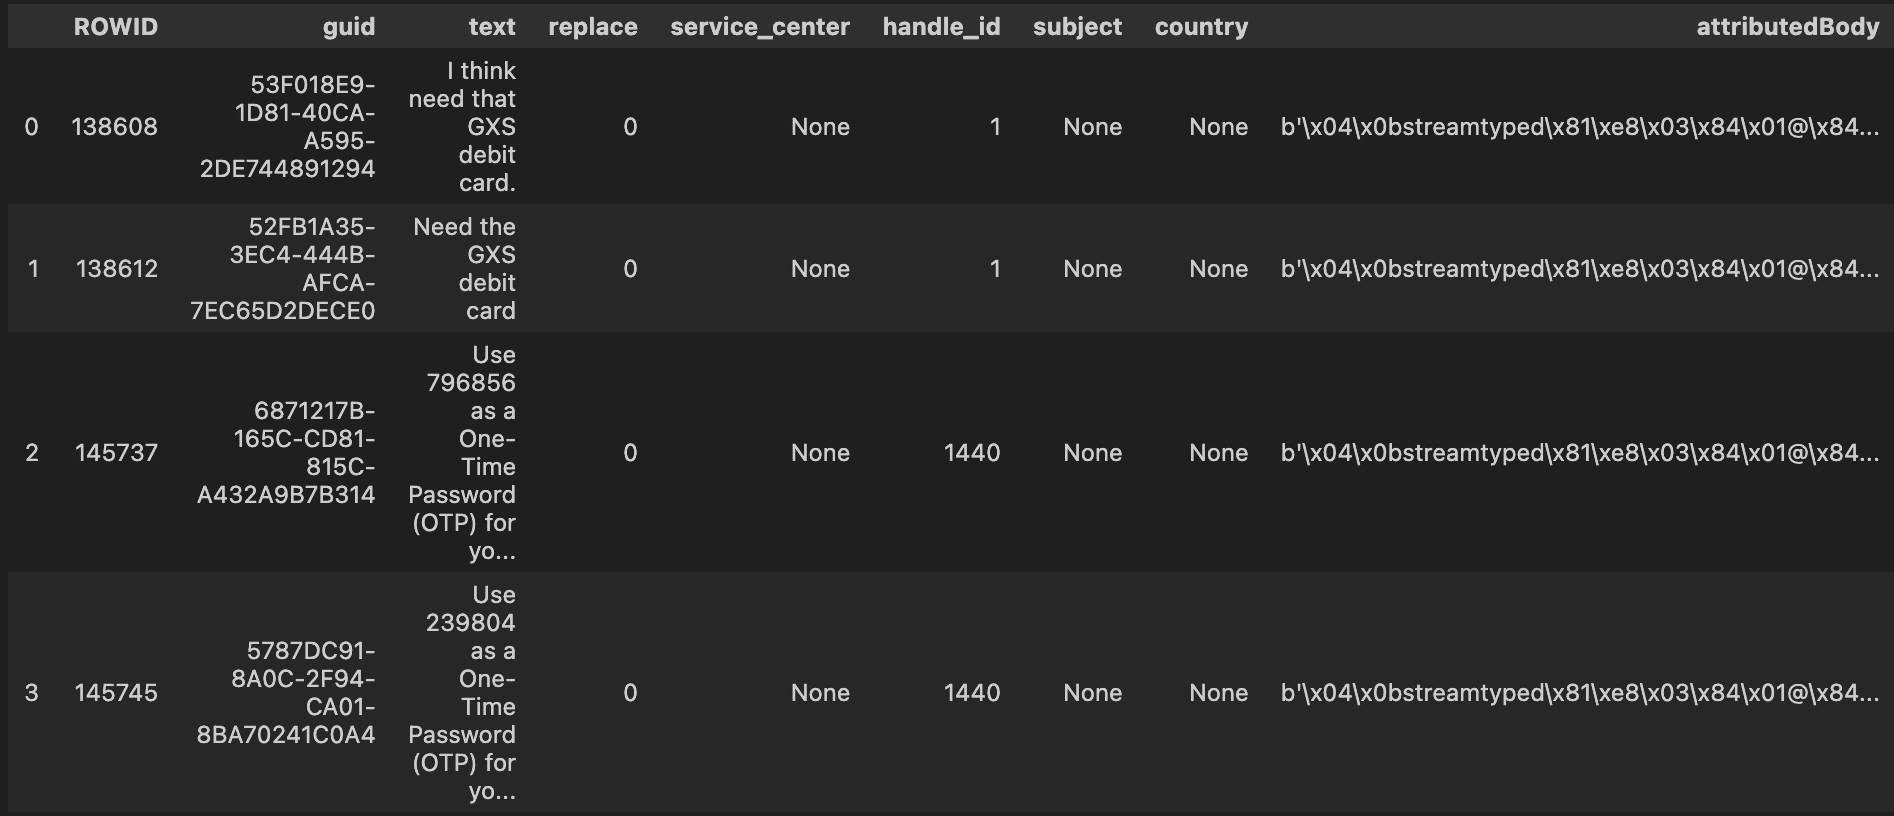
There are 4 rows that matches the search with GXS Debit Card cause this phrase is mentioned during one of the chat with a friend. You can see that there's 2 handle_id which is the ID that uniquely identifies a sender in the database. In this instance, we are interested in the handle_id 1440 which belongs to GXS. This handle_id would be different in your case.
We will use that handle_id to get the latest message to extract the OTP.
otp_input_xpath = '//*[@id="otpForm"]/table/tbody/tr[9]/td[3]/input'
ok_btn_xpath = '//*[@id="submitOTP"]'
In the page requiring OTP, we grab the xpath for the OTP input as well as the ok button to click on it after passing in the OTP. Do note this is embedded inside an iframe which I mentioned how to examine them in the previous article. I will share the entire script on github.
Timing the entire thing
To satisfy my curiousity, how much time spent vs how much cashback I received. I wrote a decorator to use it on the main function that I ran.
I felt decorator is something not spoke about often, at least in my perspective because it does seem pretty complicated. However, it can be powerful and extremely efficient. Read the linked article below to understand deeper and how it works. It's magical.
def timer(func):
    def wrapper(*args, **kwargs):
        start_time = time.time()
        result = func(*args, **kwargs)
        end_time = time.time()
        execution_time = end_time - start_time
        print(f"Execution time for {func.__name__} function: {execution_time} seconds")
        return result

    return wrapper
You can check out the following article how decorators work.
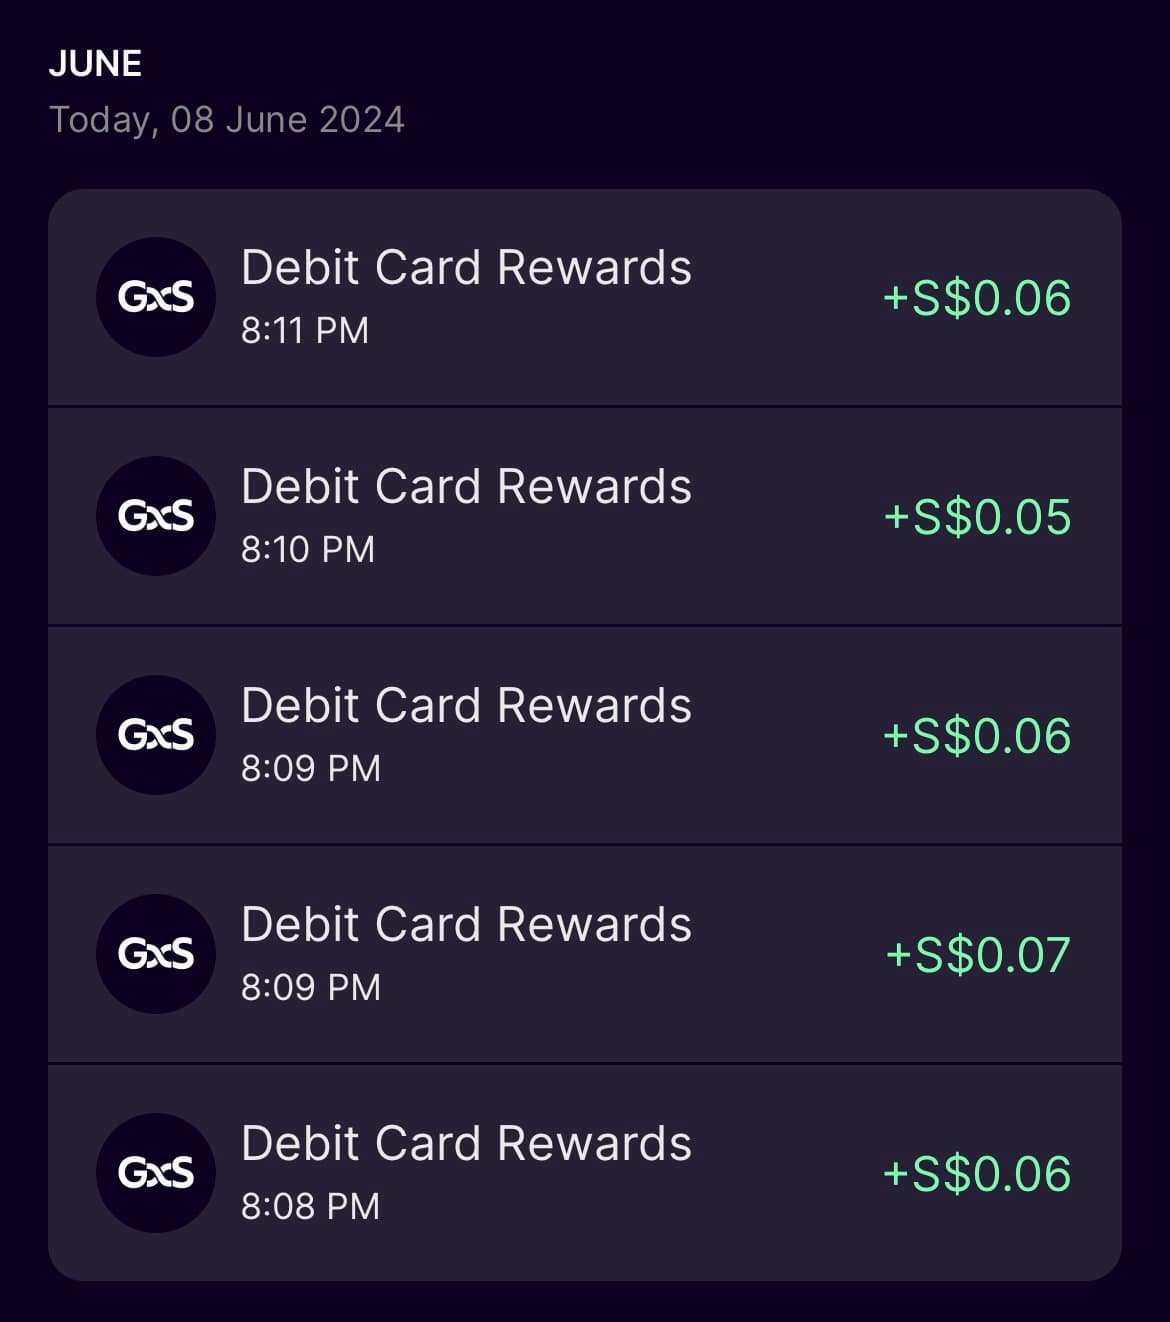
I made a payment of $10 for 5 times for this test. The entire script took 212 seconds. And I received $0.30 in total, with a click of a button. Not so bad. I believe if the amount is larger, the cashback would probably be more.
Conclusion
I love what selenium can do. I'm not too sure if there's a way to programmatically extract SMS from Android phones as I don't own one. I figured there should be. Feel free to reach out if you would like to share how.
Here's the link to the script on github.